Dynamic Actions are automatically triggered by the system when it meets certain actions. E.g. If you enter number of Child as 2 in IT0002, the system atomically triggers the IT0021, subtypes Child to enter the details. Otherwise, it will not trigger the IT0021, if you did not mention any value in number of child in IT0002. Same like that we can configure Dynamic Actions depends on our need using the path IMG->PM->PA-> Customizing Procedure → Dyn Action or by using Table T588Z.
A dynamic actions allows you to define some specific behaviors while executing an action depending, for example, on values of the last infotype filled and so on. You can state whether the action is to be carried out for “Change”, “Create” and/or “Delete” record.
(IMG menu path Personnel Management>Global Settings in Personnel Management>Basic Settings>Infotypes>Create Dynamic Actions). A dynamic measure has the following components: Infotype Number (INFTY): Specifies the infotype that triggers (trigger) action.
Enable Dynamic Actions in Salesforce
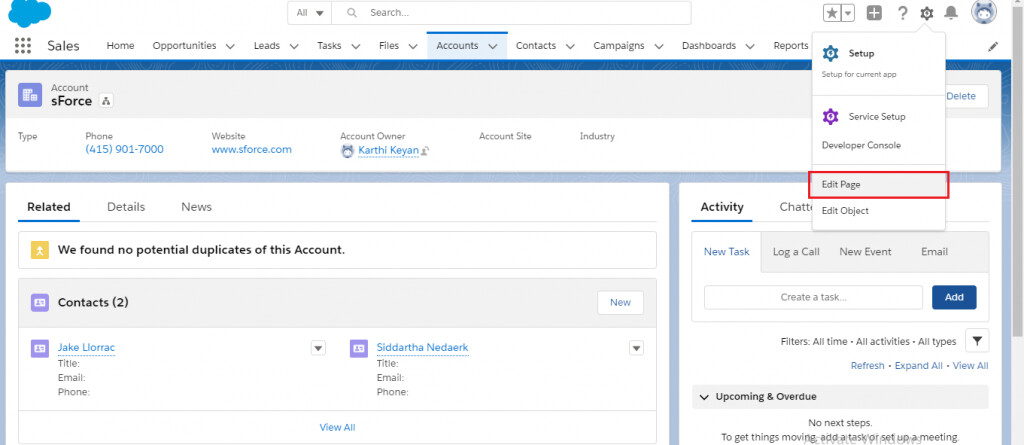
- Step-1: Open any of the Object record page and go to Edit Mode.
- Step-2: Click the Highlight panel and check Enable Dynamic Actions (Beta, desktop only). …
- Step-3: Click Add filter if we need to add filter based on the Record or Device or User or Permission.
Dynamic Action will enable us to create uncluttered, intuitive and responsive pages that display only the actions need to see based on criteria that we specify.
Instead of scanning an endless list of actions, we will be presented with a simple choice, relevant to their role, profile, or when a record meets certain criteria. Which actions are available and when they appear will be configured in the Lightning App Builder instead of the traditional page layout editor, leading to reduced administrative time and effort. Dynamic Actions will be available in our production instance from the Summer ‘20 release. Dynamic Actions will helps us to choose the dynamic actions for the relevant objects.
Step-1: Open any of the Object record page and go to Edit Mode.
Step-2: Click the Highlight panel and check Enable Dynamic Actions (Beta, desktop only).
Note: We need to do this on every Lightning Page we wish to use Dynamic Action.

Step-3: Click Add filter if we need to add filter based on the Record or Device or User or Permission.

Steps for Record:
Click the Record Tab. Now choose the field, operator and Value and click Done
Steps for Device:
Click the Device Tab. Now Choose the Form factor, Operator and Value and click Done.
Steps for Advance:
Click the Advance Tab and click Field. Now choose the Device or User or Permission or Record. Choose the relevant action based on the field and click Done. Now choose the Operator and Value and click Done.
Step-3: Choose the Add Action.
Step-4: Repeat the step 2 and 3 until we add all the buttons.
Step-5: Then reorder the actions.
Step-6: After that, click Save and Activate the page.